Starting a Session
1. When you log into the website, you will automatically land on your Dashboard. If you have navigated to another page, just click on the "Videoconference" tab along top of your browser window to get back to the Dashboard.

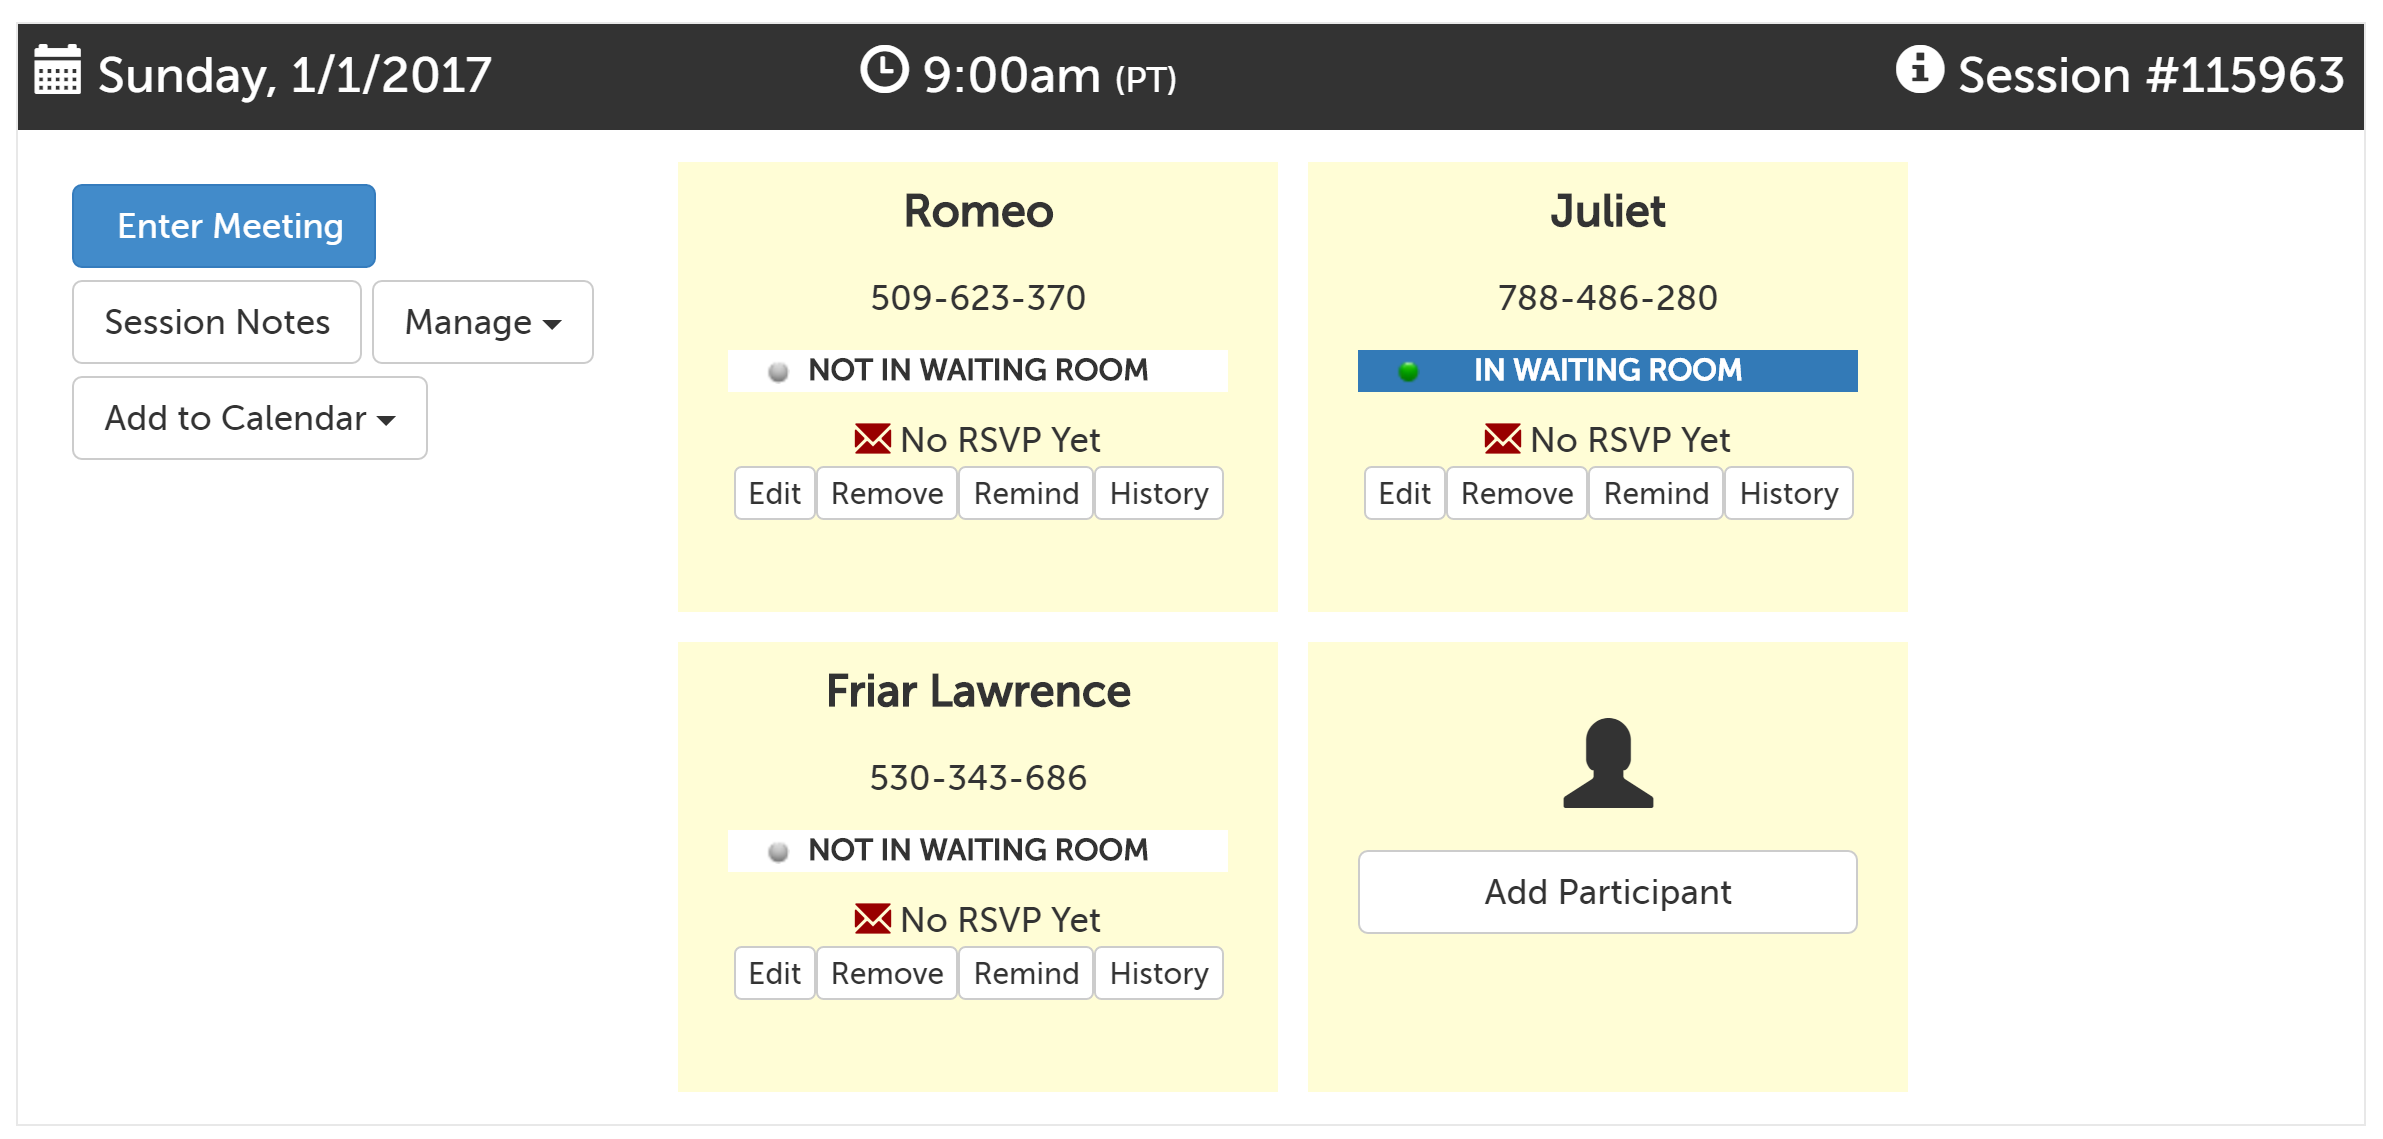
2. If one of your invitees has entered the waiting room, you will see a status notification underneath their name. In the below example,
- Not in Waiting Room (dot is gray, with "Not in Waiting Room" message):
Romeo and Friar Lawrence are not online.
- In Waiting Room (dot is green, with "In Waiting Room" message):
Juliet has entered the waiting room and is ready to be connected to.
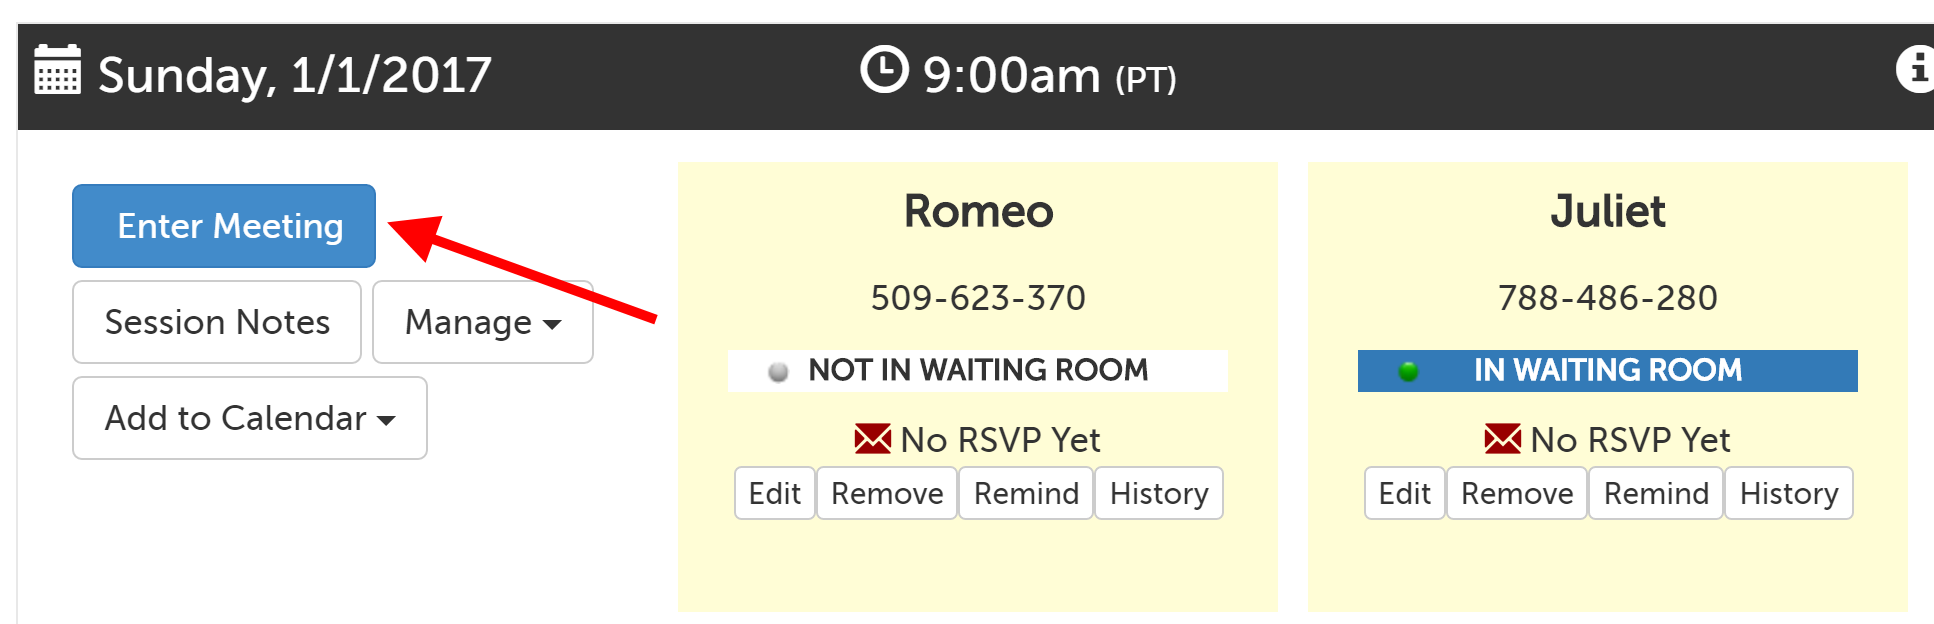
3. Click on the "Enter Meeting" button when you are ready to launch the meeting. (It may take up to a minute to finish connecting to your participants.) Once a meeting has been started, any other invitees will be automatically added to the meeting when they arrive, without further action by you. Depending on your browser, you may be prompted to confirm that Zoom is allowed to launch.
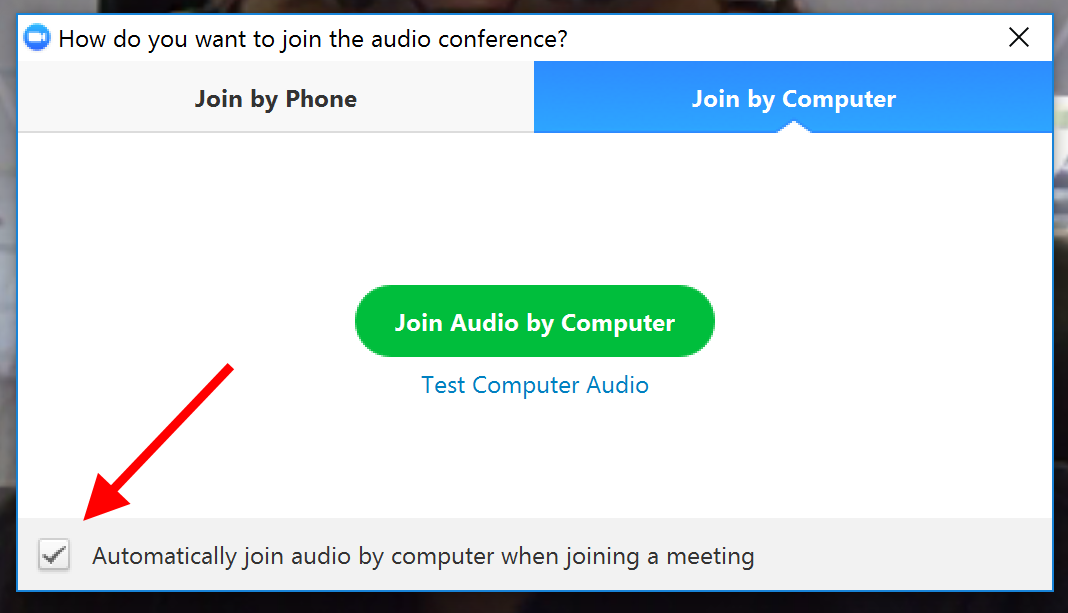
4. If connecting for the first time, you'll be prompted to choose how to enable your audio. Click "Join Audio by Computer" to use your computer's microphone and speakers.
- TIP: Check the box next to "Automatically join audio by computer when joining a meeting" before clicking "Join Audio by Computer" to avoid having to confirm this every time.
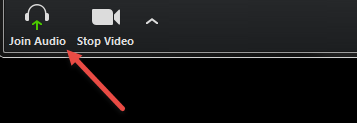
5. If you do not click “Join audio by computer” then your participants won’t be able to hear you and you also won’t be able to hear them. To fix this while in session, click “Join Audio” in the lower left hand corner."
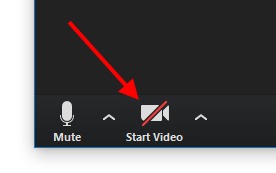
6. Allow others to see you by clicking the "Start Video" button as well.
When Zoom Waiting Room is Enabled
Enable Zoom Waiting Room Feature
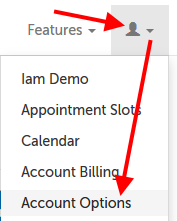
1. While logged in as an Account Administrator, click on the profile tab (head/shoulders icon) and select "Account Options" from the drop-down menu.
2. Click on the "In Session" section to expand it.

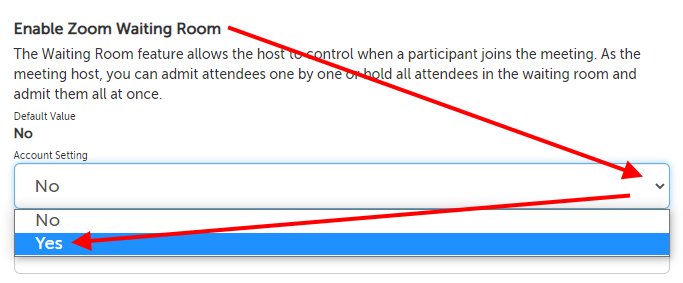
3. Scroll down to the "Enable Zoom Waiting Room" option and change the setting from "No" to "Yes". The change will be saved automatically.
Starting a Session When Zoom Waiting Room is Enabled
1. When you log into the website, you will automatically land on your Dashboard. If you have navigated to another page, just click on the "Videoconference" tab along top of your browser window to get back to the Dashboard.
2. If one of your invitees has entered the waiting room, you will see a status notification underneath their name. In the below example,
- Not in Waiting Room (dot is gray, with "Not in Waiting Room" message):
Romeo and Friar Lawrence are not online.
- In Waiting Room (dot is green, with "In Waiting Room" message):
Juliet has entered the waiting room and is ready to be connected to.
3. Click on the "Enter Meeting" button when you are ready to launch the meeting. (It may take up to a minute to finish connecting to your participants.) Depending on your browser, you may be prompted to confirm that Zoom is allowed to launch.
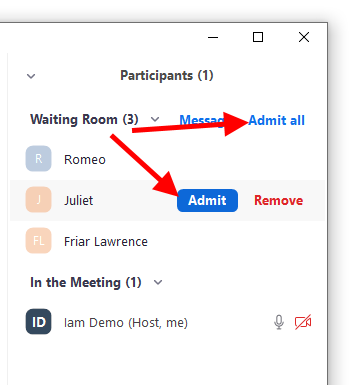
4. Once Zoom is open, click on the "Participants" button at the bottom of the Zoom app.
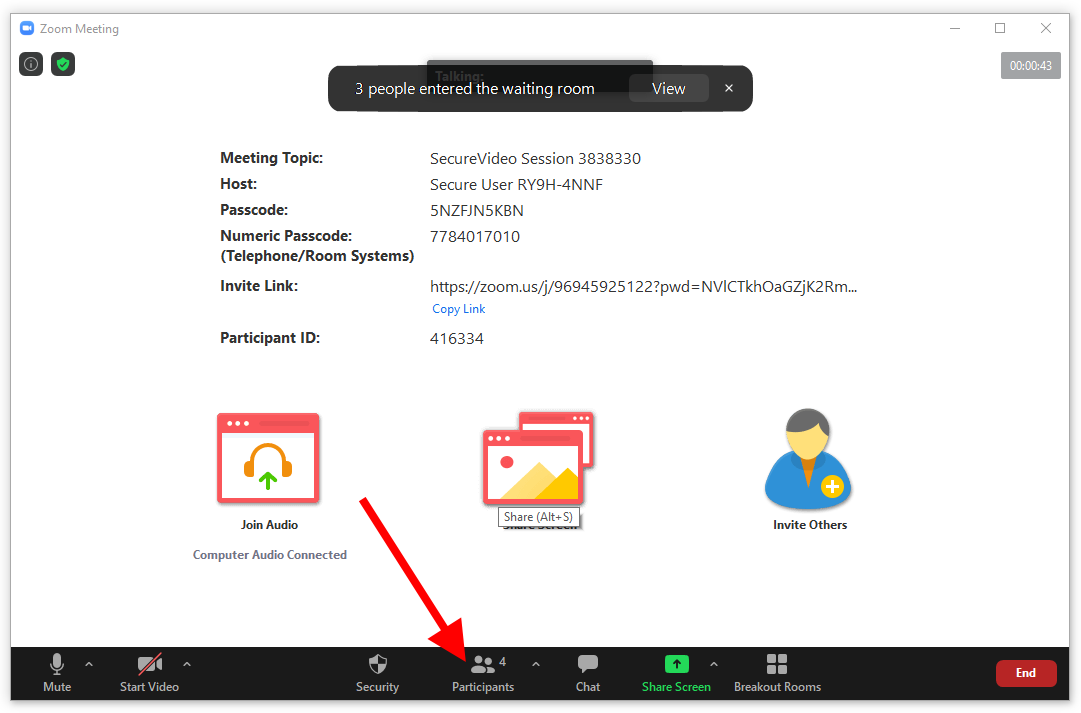
5. A panel will appear on the right hand side of the Zoom app window.
- Click "Admit All" to all all participants in the Waiting Room to enter the meeting OR
- Hover each name and click the "Admit" button that appears to allow just that single participant into the meeting.
This article was last reviewed by our Support team on August 20, 2020.